


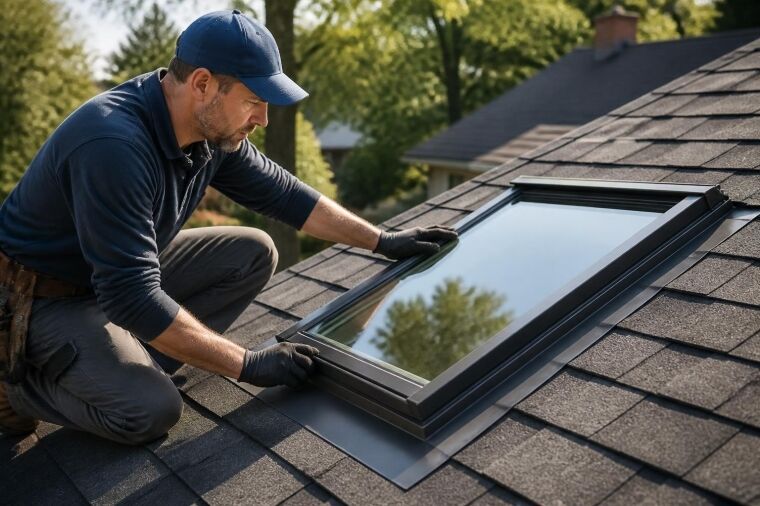
Skylights transform dark, enclosed spaces into naturally lit, energy-efficient rooms that enhance both comfort and property value. However, installing or replacing these roof-mounted windows requires specialized expertise that goes beyond standard roofing work. A qualified skylight contractor brings together roofing knowledge, waterproofing skills, and energy-efficiency expertise to ensure your skylight performs flawlessly for decades. Whether you're adding natural light to your Joliet home or replacing an aging unit that's started to leak, understanding what separates exceptional contractors from amateur installers will help you make informed decisions and avoid costly mistakes.
Understanding the Role of a Professional Skylight Contractor
A skylight contractor specializes in the precise work of cutting roof openings, installing skylight units, and creating weathertight seals that prevent water intrusion while maintaining structural integrity. This work demands detailed knowledge of roof construction, framing requirements, flashing systems, and local building codes.
Professional contractors assess your roof's structure before cutting any openings. They evaluate rafter spacing, identify load-bearing elements, and determine whether additional framing support is needed. This preliminary work prevents sagging, ensures proper weight distribution, and maintains your roof's structural soundness.
Key Responsibilities and Expertise Areas
Beyond basic installation, experienced contractors manage multiple technical aspects:
- Waterproofing and flashing – Creating multilayered barriers that shed water away from the opening
- Energy performance – Selecting and installing units that meet energy-efficient home improvement standards
- Ventilation integration – Coordinating operable skylights with existing HVAC systems
- Code compliance – Ensuring installations meet IRC requirements and local amendments
- Warranty protection – Following manufacturer specifications to preserve product warranties
The distinction between a general roofer and a specialized skylight contractor often becomes apparent in the flashing details. Poor flashing causes 95% of skylight leaks, making this the most critical installation phase.

Skylight Types and Installation Considerations
Understanding the different skylight categories helps you communicate effectively with contractors and select the right product for your space. Each type presents unique installation challenges and performance characteristics.
Fixed vs. Ventilating Skylights
Fixed skylights provide daylight only, while ventilating models open to provide natural airflow. Ventilating units require electrical connections for motorized operators and integration with rain sensors. Your contractor should assess ceiling height and accessibility when recommending manual versus electric operation.
Curb-mounted skylights sit atop a raised frame, offering easier flashing and better weather resistance. Deck-mounted units install flush with the roof plane, creating sleeker aesthetics but demanding more precise waterproofing. The National Roofing Contractors Association provides detailed guidance on both mounting methods.
Tubular Daylighting Devices
Tubular skylights bring natural light to interior spaces without traditional skylight costs or structural modifications. A reflective tube channels light from a small rooftop dome to a ceiling diffuser, illuminating hallways, closets, and bathrooms.
Installation typically takes 2-3 hours and requires minimal structural changes. However, tube routing through attic spaces demands careful planning to avoid HVAC ducts, electrical lines, and insulation displacement. Qualified contractors verify that installations maintain your home's thermal envelope integrity.
| Skylight Type | Typical Cost | Installation Time | Best Applications |
|---|---|---|---|
| Fixed curb-mounted | $800-$2,500 | 6-8 hours | Living rooms, kitchens, primary spaces |
| Ventilating deck-mounted | $1,200-$3,500 | 8-10 hours | Bathrooms, attic conversions, kitchens |
| Tubular daylighting | $400-$1,200 | 2-4 hours | Hallways, closets, interior bathrooms |
| Custom pyramid/ridge | $2,500-$8,000 | 12-16 hours | Cathedral ceilings, commercial spaces |
Selecting a Qualified Skylight Contractor
Choosing the right contractor protects your investment and prevents water damage, energy loss, and structural problems. Several key qualifications separate experienced professionals from general contractors dabbling in skylight work.
Licensing and Insurance Requirements
Verify your contractor holds appropriate Illinois roofing licenses and maintains comprehensive insurance coverage. General liability insurance protects against property damage during installation, while workers' compensation coverage shields you from liability if installers are injured on your property.
Request certificates of insurance directly from the carrier, not just copies from the contractor. Certificates should show current coverage with limits of at least $1 million for general liability. Many roofing contractors in Joliet provide this documentation proactively as part of their estimate process.
Manufacturer Certifications
Leading skylight manufacturers including VELUX, Solatube, and Sun-Tek offer certification programs for contractors. These credentials demonstrate specialized training in proper installation techniques, flashing methods, and product-specific requirements.
Certified contractors typically provide enhanced warranties beyond standard manufacturer coverage. Some programs extend leak warranties from 10 years to 20 years when certified installers perform the work. Ask potential contractors about their certifications and training completion dates.
Experience with Your Roof Type
Installation techniques vary significantly across roofing materials. Asphalt shingle roofs require different flashing approaches than metal, tile, or flat membrane systems. Contractors experienced with residential shingle roofing bring valuable expertise to typical Midwest home installations.
Ask prospective contractors:
- How many skylights have you installed on roofs similar to mine?
- Can you provide references from projects completed in the past year?
- What specific challenges do you anticipate with my roof type and pitch?
- How do you handle unexpected conditions like rotted decking or insufficient framing?
Experienced contractors answer these questions confidently with specific examples rather than vague generalities.
The Professional Installation Process
Understanding the installation sequence helps you evaluate contractor proposals and recognize quality workmanship. Professional skylight contractors follow systematic approaches that prioritize waterproofing and structural integrity.
Site Assessment and Planning
Initial evaluations determine feasibility and identify potential obstacles. Contractors examine attic spaces to locate rafters, check for adequate clearance, and verify that proposed locations won't interfere with structural elements or mechanical systems.
This phase includes measuring roof pitch, which affects skylight sizing and flashing requirements. Steep pitches (8:12 and above) may require specialized equipment and safety systems, increasing labor costs. Your contractor should address fall protection requirements when working on steeper roofs.
Structural Modifications
After finalizing locations, contractors cut roof openings and install support framing. This typically involves:
- Removing shingles and underlayment in the designated area
- Cutting through roof decking with precise measurements
- Installing headers between rafters to frame the opening
- Adding trimmer rafters if the opening exceeds standard rafter spacing
- Constructing curbs for curb-mounted units
Proper framing prevents sagging and ensures the skylight sits level. The Building America Solution Center provides detailed guidance on framing requirements for replacement projects.
Flashing and Waterproofing
This critical phase determines whether your skylight will leak. Professional contractors follow strict sequencing:
- Install ice and water barrier – Apply self-adhesive membrane around the opening's perimeter
- Set the skylight unit – Position and secure according to manufacturer specifications
- Install step flashing – Layer metal flashing pieces with each shingle course
- Apply head flashing – Create water diversion at the skylight's upper edge
- Integrate with roofing material – Weave flashing seamlessly with surrounding shingles
The DOE Building Science Education program offers techniques for adding flashing to existing skylights without complete roof removal, useful for retrofit projects.
Interior Finishing
After exterior installation, contractors complete interior work including insulation, drywall finishing, and trim installation. This phase demands carpentry skills to create clean transitions between ceiling planes and skylight shafts.
Light shaft configuration significantly impacts both aesthetics and light distribution. Splayed shafts (wider at the ceiling than the roof opening) maximize light spread and create dramatic visual effects. Straight shafts cost less but deliver more concentrated illumination.
Energy Efficiency and Performance Standards
Modern skylights deliver substantial energy benefits when properly selected and installed. Understanding performance metrics helps you make informed product choices and potentially qualify for tax incentives.
NFRC Ratings Explained
The National Fenestration Rating Council (NFRC) provides standardized energy-performance labels for skylights. Four key metrics appear on certified products:
U-Factor measures heat transfer, with lower numbers indicating better insulation. Quality skylights achieve U-factors between 0.25 and 0.35, comparable to energy-efficient windows. The NFRC Certified Products Directory lets you verify ratings for specific models.
Solar Heat Gain Coefficient (SHGC) indicates how much solar radiation passes through. Values range from 0 to 1, with lower numbers reducing cooling loads. Southern exposures benefit from SHGC below 0.30, while northern skylights may use higher values to capture winter heat.
Visible Transmittance (VT) measures daylight transmission. Higher VT values (0.40-0.60) maximize natural lighting while maintaining energy performance.
| Performance Metric | Excellent Range | Good Range | What It Affects |
|---|---|---|---|
| U-Factor | 0.25-0.30 | 0.31-0.40 | Heating costs, condensation risk |
| SHGC | 0.25-0.35 | 0.36-0.45 | Cooling costs, fading, comfort |
| VT | 0.45-0.60 | 0.35-0.44 | Daylight quality, brightness |
| Air Leakage | <0.20 | 0.21-0.30 | Drafts, energy loss |
Federal Tax Credits and Rebates
The Energy Efficient Home Improvement Credit provides tax incentives for qualifying skylight installations through 2032. Eligible products must meet ENERGY STAR Most Efficient criteria, which exceeds standard ENERGY STAR requirements.
Your skylight contractor should provide NFRC documentation and manufacturer certifications needed for tax-credit claims. The credit covers 30% of product and installation costs, up to $600 for skylights specifically. Additional home upgrade incentives may apply when combining skylight installation with other energy improvements.
Common Installation Challenges and Solutions
Even experienced contractors encounter complications during skylight installations. Understanding typical challenges helps you evaluate how contractors plan for contingencies and solve problems.
Inadequate Roof Framing
Older homes often have irregular rafter spacing or undersized framing members. Contractors must add supplemental support while maintaining attic insulation continuity and ventilation pathways.
This situation requires structural assessment skills beyond basic carpentry. Some contractors consult with structural engineers for complex framing modifications, adding 1-2 days and $500-$1,500 to project costs.
Condensation and Moisture Management
Temperature differences between warm interior air and cold skylight surfaces create condensation risk. Professional installations include proper insulation around light shafts and vapor barriers that prevent moisture from reaching cold surfaces.
The ASHRAE Handbook guidelines address moisture control where building envelope penetrations occur. Contractors should specify continuous insulation around skylight curbs and verify that installations don't create thermal bypasses.
Coordinating with Existing Roof Systems
Integrating skylights into established roofing systems requires matching flashing materials and techniques to existing roof assemblies. Metal roofs, tile installations, and modified bitumen systems each demand specialized approaches.
Commercial roofing specialists bring particular expertise to flat-roof skylight installations, where curb height and membrane integration prove critical for long-term performance.
Maintenance and Long-Term Performance
Post-installation care determines whether your skylight delivers decades of trouble-free service or becomes a recurring headache. Professional contractors provide maintenance guidance and often offer service programs.
Annual Inspection Checklist
Homeowners should inspect skylights twice yearly, ideally in spring and fall:
- Check for water stains on interior surfaces around the shaft
- Examine exterior flashing for lifted edges or missing sealant
- Clean glass surfaces and remove debris from exterior well areas
- Test operable units for smooth operation and proper sealing
- Verify weep holes remain clear and functional
Professional inspections every 3-5 years catch developing problems before they cause damage. Many contractors include free inspections for customers, building relationships that lead to roof repair and maintenance work.
Addressing Minor Issues Promptly
Small problems escalate quickly with skylights. A minor seal failure can allow moisture into wall cavities, causing mold growth and structural damage costing thousands to remediate.
Common early warning signs include:
- Condensation between glazing layers (seal failure)
- Drafts around the skylight frame (weatherstripping degradation)
- Light water staining after heavy rain (flashing compromise)
- Yellowing or cloudiness in acrylic domes (UV degradation)
Contact your skylight contractor immediately when these symptoms appear. Most issues cost $200-$600 to address when caught early but require complete reinstallation ($2,000-$5,000) if ignored.
When Replacement Becomes Necessary
Even quality skylights eventually require replacement. Typical service life ranges from 15-25 years for residential units, depending on quality, climate exposure, and maintenance.
Consider replacement when:
- Multiple leak repair attempts have failed to solve persistent problems
- Energy bills have increased due to failing seals or outdated glazing technology
- Visible frame deterioration threatens structural integrity
- Upgrading to ENERGY STAR products would qualify for substantial tax credits
The replacement and retrofitting process often proves simpler than initial installation since framing already exists. Experienced contractors complete replacements in 4-6 hours with minimal interior disruption.
Costs and Budget Planning
Skylight installation costs vary widely based on unit type, roof complexity, and structural modifications required. Understanding cost components helps you budget appropriately and evaluate contractor proposals.
Typical Price Ranges for 2026
Product costs represent 30-50% of total project expenses. Standard residential skylights range from $300-$2,000, while premium units with advanced glazing and electronic controls cost $1,500-$4,000.
Labor and installation typically run $400-$1,500 for straightforward installations on accessible roofs with standard pitches. Complex projects involving structural modifications, difficult access, or premium roofing materials may cost $1,200-$3,000 for labor alone.
Additional expenses include:
- Interior finishing and drywall work: $200-$600
- Paint and trim materials: $75-$200
- Electrical connections for motorized units: $150-$400
- Structural engineering consultations: $300-$800
- Permits and inspections: $50-$200
Getting Accurate Estimates
Request detailed written estimates from at least three contractors. Complete proposals should itemize products, labor, materials, permits, and contingency allowances for unexpected conditions.
Beware of estimates significantly below competitors' pricing. Low bids often indicate:
- Unlicensed or uninsured contractors cutting corners on liability protection
- Inferior materials that won't meet manufacturer warranty requirements
- Incomplete scope that excludes necessary work like interior finishing
- Contractors unfamiliar with true project requirements making unrealistic estimates
Quality roofing services provide transparent pricing with clear explanations of what's included and potential additional costs.
Financing and Payment Terms
Many contractors offer financing through third-party lenders, enabling you to spread costs over 12-60 months. Compare annual percentage rates, origination fees, and prepayment penalties before committing.
Standard payment schedules typically include:
- Deposit – 10-25% upon contract signing to secure scheduling and order materials
- Progress payment – 25-50% when materials arrive or installation begins
- Final payment – Remaining balance upon completion and your satisfaction
Never pay the full amount upfront. Reputable contractors have supplier accounts and don't need complete payment to purchase materials.
Warranty Protection and Contractor Guarantees
Comprehensive warranty coverage protects your investment against defects and installation failures. Understanding what's covered and who stands behind the work proves essential.
Manufacturer Product Warranties
Quality skylight manufacturers provide 10-20 year warranties covering glass seal failures, frame defects, and hardware malfunctions. Premium brands extend coverage to 30 years for certain components.
Read warranty fine print carefully. Many warranties become void if:
- Non-certified contractors perform installation
- Modifications are made to the product during installation
- Required flashing kits aren't used
- Regular maintenance isn't performed
Your contractor should provide complete warranty documentation and explain registration requirements.
Installation Workmanship Guarantees
Separate from product warranties, contractor workmanship guarantees cover installation quality. Responsible contractors warrant their work for 2-10 years, addressing leaks or failures resulting from improper installation.
Verify guarantee terms in writing:
- Leak protection duration – How long is flashing work guaranteed?
- Coverage scope – What specific failures are included or excluded?
- Response commitments – How quickly will the contractor address warranty claims?
- Transferability – Does coverage transfer to new homeowners if you sell?
Companies that offer extended warranties demonstrate confidence in their work quality. Some provide lifetime leak guarantees on labor when you use their services for roof replacement and skylight installation together.
Questions to Ask Before Hiring
Prepare specific questions that reveal contractor experience, business practices, and commitment to quality. Their answers help you compare options objectively.
Experience and qualifications:
- How many skylights do you install annually?
- What manufacturer certifications does your installation team hold?
- Can you provide references from projects completed in the past six months?
Project approach:
- How do you protect my home's interior during installation?
- What happens if you discover rotted decking or inadequate framing?
- How do you ensure proper attic ventilation and insulation around the skylight?
Business practices:
- Who will supervise the installation crew daily?
- How do you handle change orders or unexpected additional work?
- What's your typical timeline from contract signing to project completion?
Strong candidates answer confidently with specific details rather than vague assurances. They welcome questions and provide thorough explanations that demonstrate expertise.
Choosing the right skylight contractor makes the difference between a beautiful, energy-efficient addition that enhances your home for decades and a perpetual maintenance headache that causes water damage and regret. Professional installation requires specialized skills in roofing, waterproofing, and energy performance that general contractors often lack. Whether you're planning a single skylight installation or upgrading multiple units throughout your property, Great Roofing brings the expertise, certifications, and commitment to quality that Joliet-area homeowners trust for all their exterior projects. Contact our family-owned team today to schedule a consultation and discover how professional skylight installation can transform your living spaces with natural light.